Tuesday 18 September 2012

The Big Woolly Crochet Moomin Blog

Over the past few months I've been crocheting moomins. I've made three, and every time I make them I forget how much time and effort they take and I want to cry before I've even gotten round to assembling them. However once they are finished I think they look quite impressive and are probably the most rewarding figures I've crocheted so far. 

After trawling the web, I found this pattern from Crochet Amigurumi Blogg. Unfortunately it's in Swedish so it took me a while to get the hang of the pattern and it took me forever to work out the pattern, but I worked out in the end that "tills" is the same as a stitch decrease (sc2tog) and as long as you make sure the number of stitches add up at the end of each row you should be dandy. If you plan to make a moomin I'd strongly suggest using a stitch marker and moving it as you crochet each row, as especially in the head, every row seems to be different and it's easy to lose track of where you are up to! As a result, the first moomin I made had more of a bulbous bulge than the cute moomin snout, and as much as people compliment me on it, I'll always look at it with a bit of disdain...

Although I occasionally post photos of the moomins in progress and after they are finished, I thought it would be quite nice to put them all in one place and explain a bit about the making of them, which hopefully will also be useful if anyone fancies having a go at crocheting one.


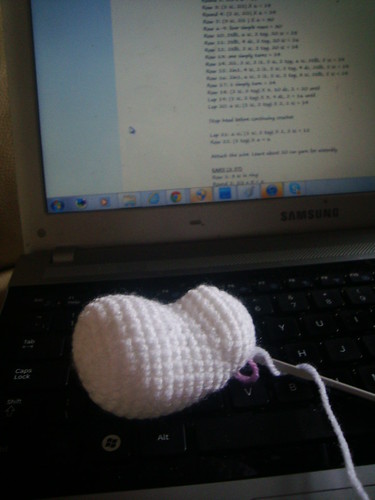
The first thing to start with is the head. The number of stitches, and most importantly where you decrease stitches, gives the head the moomin shape. This is why it's important to use a stitch marker, because if you miss out stitches then you might end up decreasing in the wrong position and your head won't be the right shape! Here the head is ready to stuff.


Next, to the start the body.
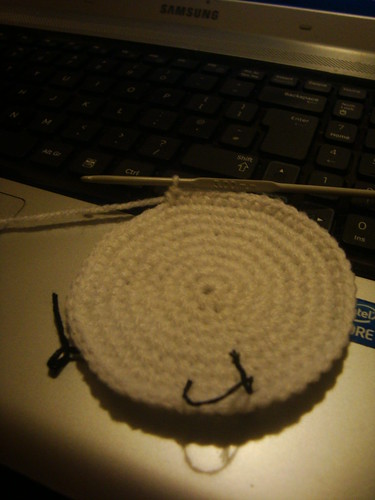
Here is the base of body (the black thread acting as a stitch marker). 
Unlike with most amigurumi/stuffed toys I've made in crochet, you start at the bottom of the body and crochet upwards.


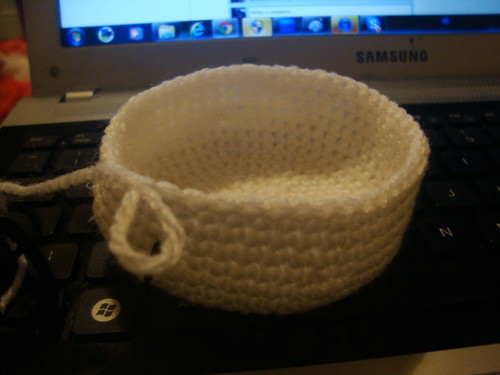
Here I am continuing to crochet the body from the bottom upwards, to create a basket shape.


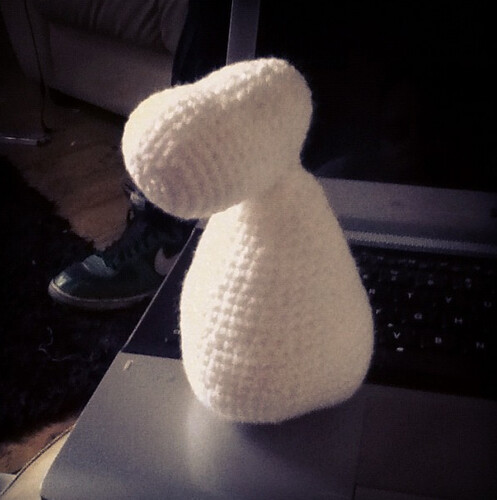
Eventually you will decrease the amount of stitches per row so the body gets a conical shape and will taper up to form the upper body and neck.


Once the body and head are finished, stuffed full of fiber filling and fastened off, the head is sewn to the body.


The ears and made and sewn on, and the limbs and tail are then made, stuffed, and sewn on.

Moomin II, made for my best friend Rach

Then it comes to the details!
 Yellow yarn can be sewn into the top of the head, and if you separate the individual yarn strands you get a lovely blonde fringe (great if you want to make a Snorkmaiden moomin!). 
The eyes can be embroidered on, and here I used black and brown embroidery thread. I originally tried to make the eyes out of felt but I didn't feel there was enough of a contrast between white or cream felt (for the pupils of the eye) against the white wool of the moomin. Safety eyes could also be used, but I don't feel they would make it look much like a moomin!

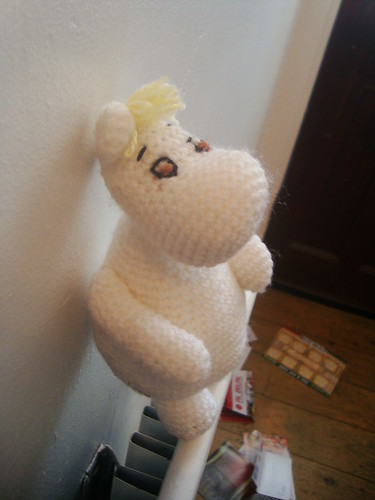
Moomin II posing on our radiator.

I was then asked to custom make a moomin for a fellow Twitter-er. I used a design similar to Moomin II which can be seen above. I call this one Moomin III (even though I based the last two on the character Snorkmaiden so they really should be Snorkmaiden I & II...OH WELL).

The back of Moomin III.

I based the details of Moomin III on this photo and I'm very happy with the result!


Ta-daaa!

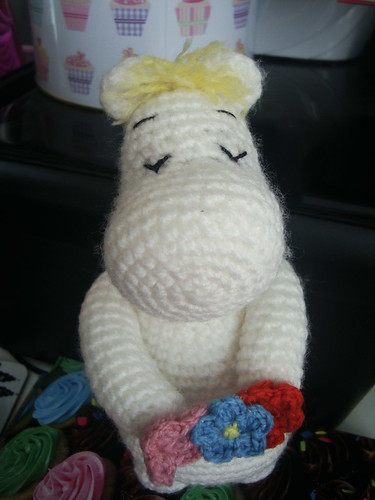
For this moomin I changed the position of the arms and stitched them into the body so that they appeared to be more closed. I was then able to create some tiny flowers using this easy pattern by Jodie Kundhi and stitch them together and to the front of the arms, to give the appearance that the moomin is offering flowers. I stitched a bit of the same coloured yarn as the hair to make the flowers look a bit more exciting.

I also changed the embroidery of the eyes to appear closed, as I felt it made the moomin look cuter than embroidering on wide open eyes.


So there we have it. Woolly crochet moomins!

I am happy to custom make moomins, however they do take quite a bit of time and effort, and as I'm starting back at uni on the 24th September I need to start balancing crochet with uni stuff (sad face). 
However if you'd like me to make you a moomin, please DM me on Twitter (@shutupcaf) 
:)

Tuesday 4 September 2012

Up, Up & Crochet!

A few months ago I got sucked into the addictive hoover that is crochet and I haven't been able to emerge since. I don't really mind though, it just means my house is covered in bits of wool and every day a new stuffed animal makes it onto our TV cabinet to obscure the view of the screen a little more. I planned on blogging about it from the start but due to general laziness and being too busy with...er...crochet, I never quite managed. So here I am, three-ish months later attempting to do my first crochet blog!

I gained an interest in crocheting when my mum bought me the Cath Kidston Crochet Book for Christmas which included a crochet hook, a few balls of yarn and an instruction manual. I wouldn't recommend it to anyone. The wool is bad quality, there isn't enough of it to complete the project (a granny square cushion) and the written instructions were impossible to work out, not just for someone who has never crocheted before, but even my mum (who has crocheted in the past) couldn't work out the basic stitches from the sketches in the book. I also felt it was also massively overpriced at £20, as you can get a crochet hook for £1-2 on the high street and a huge bundle of wool (not amazing quality but significantly better than those in the kit) for about £1.60 (Wilkinsons, Dunelm Mill and Abakhan Fabrics are my favourite places for wool, but you can also sometimes get cheap yarn in places like The Works). The tin was nice for decoration, until the lid fell off...so yeah.


Ms Octopus knows her shit.


I found the instructions in the Cath Kidston kit stupidly confusing, and so turned to Youtube for some tutorials. Thankfully, Youtube is full to the brim of EVERYTHING and has plenty of excellent crochet tutorials. I wanted to begin with granny squares, and stumbled across the user Bethintx1 who has some brilliant videos covering all sorts of crochet patterns and stitches. I found the tutorial for granny squares particularly good as you can clearly see what she is doing as she crochets, and it's slow enough for someone who has never crocheted before to pick up. After stopping and re watching the videos on granny squares constantly for four hours getting the stitches wrong over and over again, I finally got the hang of it, and I was off! To be fair, I haven't learnt many different stitches since I started, but the more you do it the better you get at getting neater, more even stitches (or I was just a shit beginner crocheter, haha).

Below is part 1 of the granny square tutorial. (The video uses American crochet terminology which is different from the British terminology, in case you want to learn the British terms. They are pretty easy to translate across, I just prefer the American terms as most of the patterns I use are American).


I also wanted to have a go at crocheting some small crochet animals (they are also known as amigurumi) so I found this tuturial on crochet pigs. I won't lie, it was a ridiculous amount of effort, took 8 hours and my first two attempts looked more like deformed bumble bees with legs, but the third one came out quite cute so I wasn't too arsed. Just following that one tutorial was enough to get the jist of written patterns too, which has meant I've been able to create a load of different animals fairly soon after I picked up my crochet hook for the first time.


Ta-daa!

Why you should give crochet a go? 

It's ridiculously satisfying, and once you learn the basic stitches (there's only really three or four) you can make most things...I've already made hats, door knob cosys, iPod pouches, cuddly tiny animals! It's all about keeping count of the amount of stitches, and trust me, once you start it's a really easy hobby, plus when I look at the things I've made I think they look so good compared to what I had to do to actually make them. It's a ridiculously rewarding hobby, just requires a lot of time and patience.

Anyway, I'll definitely be posting more about crochet in the near future so keep an eye out! :)